italianinternationalsoft breadsovernight breads

Homemade Panettone - Simplified Recipe
Amazing results with incredible aroma - I wish you could smell it!
This panettone was so fun to make! This is a simplified recipe that delivers amazing results without the complexity of traditional methods. I really wish you could smell the aroma - it's absolutely incredible! The result is super soft with beautiful strands that tear just like authentic panettone should. I recommend starting in the late afternoon to spread the process over two days for the best flavor development.
Homemade Panettone - Simplified Recipe with Amazing Results
Follow along with this detailed video guide for perfect panettone every time
Follow along with the video for a complete visual guide! You'll see exactly how to create the biga starter, develop the enriched dough, and achieve that perfect panettone texture. Watch the video for step-by-step guidance that makes this traditional Italian bread accessible to home bakers.
For the Biga Starter (Day 1)
- ½ cup Bread flour(60g)
- 1 ½ tsp. Fresh yeast(6g, or 1 tsp. (3g) dry yeast)
- 2 tbsp. Water(30ml)
For the Main Dough (Day 1 Evening)
- ½ cup Water(120ml)
- 1 ½ cups Bread flour(200g)
- 3 Egg yolks(added gradually)
- 4 tbsp. Sugar(50g)
- ¼ cup Softened butter(50g)
For Day 2 Enrichment
- 2 Egg yolks
- ½ tsp. Salt(3g)
- 2 tbsp. Bread flour(30g)
- 4 tbsp. Sugar(50g)
- ⅓ cup Softened butter(80g)
- ⅔ cup Raisins(100g, soaked overnight)
- 1 Lemon zest
- 1 Orange zest
- 1 tbsp. Honey(20g)
- ⅓ cup Candied orange peel(50g, optional)
Day 1 - Creating the Foundation
- 1Create the biga starter: In a bowl, mix bread flour with fresh yeast (or dry yeast) and water. Mix well until you have a hard dough. The result is a very stiff dough - this is exactly what you want for authentic flavor development.
- 2Develop the biga: Tear the biga into small pieces to help with fermentation. This increases the surface area and helps the yeast work more effectively.
- 3First fermentation: Cover and let ferment for 3-4 hours at room temperature. It's full of life! - you'll see bubbles forming as the yeast develops.Timer Available:Biga Fermentation (4:00:00)
- 4Prepare the main dough: Tear biga and place in the mixing bowl. Add water and bread flour. Start mixing - the mix looks dry, but that's normal.
- 5Initial mixing: Mix until everything clumps together. Don't worry if it looks rough - this is the foundation of your amazing panettone.
- 6Add enrichment gradually: Tear the dough into small pieces for better absorption. Add two egg yolks and mix until completely incorporated. This gradual addition ensures proper gluten development.
- 7Continue development: Remove the dough from the hook and add one more egg yolk. Mix for at least 15 minutes - you can increase the speed as the dough develops.
- 8Add sugar: Remove dough from hook and add sugar. Mix for 10 minutes until the dough becomes smooth and elastic. The dough is ready when it's smooth and shiny
- 9Incorporate butter: Add half the softened butter and mix until incorporated. Then add the remaining butter and mix for 5 minutes until fully combined.
- 10Test for readiness: Stretch the dough to check if it's elastic - it's thin enough to see light through. This windowpane test confirms proper gluten development.

- 11Shape and rest: With a wet hand gather it into a ball - make sure your hand is wet to prevent sticking. Looks great! Cover and let sit on the counter for 12 hours for incredible flavor development.Timer Available:Overnight Rest (12:00:00)
Day 1 Evening - Prepare the Aromatics
- 12Soak the raisins: Cover raisins with water and let soak overnight. This plumps them and prevents them from absorbing moisture from the dough.
- 13Prepare citrus zest: Grate the zest from a lemon and an orange - only use organic citrus for zest to avoid any wax or chemicals.
- 14Create aromatic mixture: Mix honey with the citrus zest. The aroma is incredible - this will add incredible flavor tomorrow. Cover and let infuse overnight.
Day 2 Morning - Final Development
- 1Check the dough: Dough should have quadrupled by now - this massive rise shows the excellent fermentation that happened overnight.
- 2Deflate and enrich: Deflate the dough and gather everything from the sides. Add two egg yolks and salt. Mix for 5 minutes - you can increase the speed as needed.
- 3Add flour: Add the additional bread flour and mix for 10 minutes. Remove the dough from hook from time to time - it will ensure even mixing.
- 4Final sugar addition: Add the remaining sugar and mix for 5 minutes. The dough is ready for the final ingredients - look how elastic it is!
- 5Add aromatics: Add our aromatic bomb (zest and honey) - this is where the magic happens for authentic panettone flavor.
- 6Final butter incorporation: Add half the remaining softened butter with a short mix to incorporate it. Then add the remaining butter and mix for 5 minutes. The dough is looking gorgeous!
- 7Windowpane test: Perform the windowpane test - the dough should be perfectly elastic and translucent when stretched.
- 8Add fruits: Add the soaked raisins and candied orange peel if using. Mix with a wet hand or spin in the mixer for 10 seconds. I prefer to do it by hand for better control.
- 9First rise: You can easily lift it from the bowl now. Let the dough rest for 1.5 hours in a warm place for the first rise.Timer Available:First Rise (1:30:00)
Shaping and Final Preparation
- 1Prepare workspace: Grease the work surface with vegetable oil or butter for easy handling.
- 2First fold: Grab the dough from the center and lift it. Fold it on itself a couple of times to redistribute the gases and strengthen the dough.
- 3Shape into ball: Tuck and fold the dough into a tight ball. This creates surface tension for better structure.

- 4Second fold: Repeat the process after 30 minutes - lift and fold, then tuck and fold into a tight ball.Timer Available:Second Fold Rest (30:00)
- 5Prepare the mold: Get the mold ready - a 7" (18 cm) panettone mold or deep round pan 4.5" (11.5 cm) high works perfectly.
- 6Final shaping: After 30 minutes repeat the process - this is the last one. Form a tight ball and place into the mold.Timer Available:Final Fold Rest (30:00)
- 7Final rise: Let it rise until it's 1" (2 cm) from the edge of the mold. This can take 2-4 hours depending on temperature.
- 8Prepare for baking: Carefully remove the wrap. Optional: leave uncovered for 15 min. to form a skin. Preheat oven to 300°F (150°C) for convection, 320°F (160°C) for conventional ovens.300°F (150°C)
- 9Score and finish: Make two cuts in a cross pattern. Add a small piece of butter in the center for traditional finishing.
Baking and Cooling
- 1Bake the panettone: Bake at 300°F (150°C) for 55 minutes (320°F/160°C for conventional ovens).300°F (150°C)Timer Available:Baking Time (55:00)
- 2Prepare for cooling: Quickly pierce the sides with two long skewers - this prevents the panettone from collapsing as it cools.

- 3Cool properly: Place the panettone upside down to cool using the skewers as supports. Let it rest and get some rest yourself! This prevents the delicate structure from collapsing.

- 4Final aging: Ideally, wrap it in an airtight bag and let it sit for a week to absorb all the flavors. But I don't have that patience - we taste now!
- 5Enjoy your creation: Super soft with incredible aroma! Cut yourself a nice wedge - it's so light! Tears into strands, as a good panettone should. I wish you could smell the aroma - it's absolutely divine!


Pro Tips for Perfect Panettone
- This is a simplified recipe - traditional panettone is even more complex, but this delivers amazing results
- Only use organic citrus for zest to avoid wax and chemicals
- The windowpane test is crucial - the dough should be translucent when stretched
- Patience is key - the overnight fermentation creates incredible flavor depth
- The aromatic bomb (zest and honey) is what gives authentic panettone its signature taste
- Pierce with skewers and cool upside down to prevent collapse
- Ideally age for a week wrapped - but few have that patience!
- Good panettone tears into strands - this texture shows proper development
Watch the Video Tutorial
See every step in action! Follow along with the complete video guide for perfect results.
You Might Also Like

Soft Braided Yogurt Bread with Crispy Crust - Perfect for Sandwiches
This braided bread is incredibly satisfying to make! With a thin, crispy crust and soft-as-a-feather inside, it's perfect for sandwiches. The yogurt adds amazing softness while the unique covered baking technique creates the thinnest, crispiest crust.
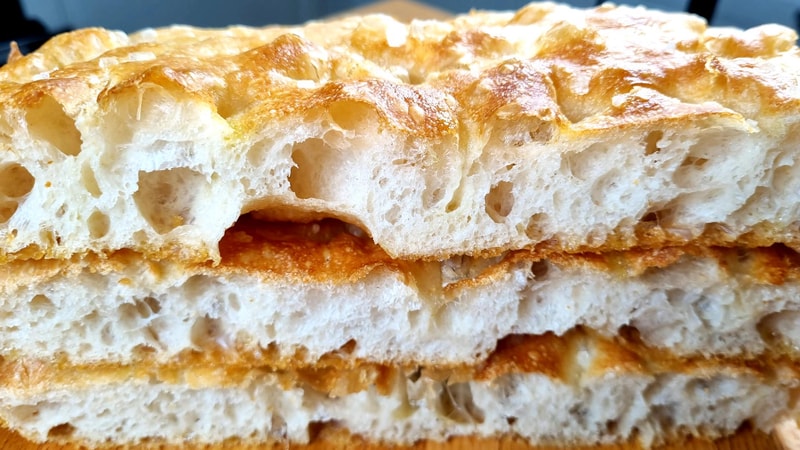
Perfect Focaccia Bread - Overnight 4-Ingredient Recipe
You can get this marvel with just 4 ingredients! Crispy crust, light and airy inside. No kneading required, just simple folds and overnight refrigeration create focaccia perfection.