artisansame day-breadsbeginner friendly

Pumpkin Bread
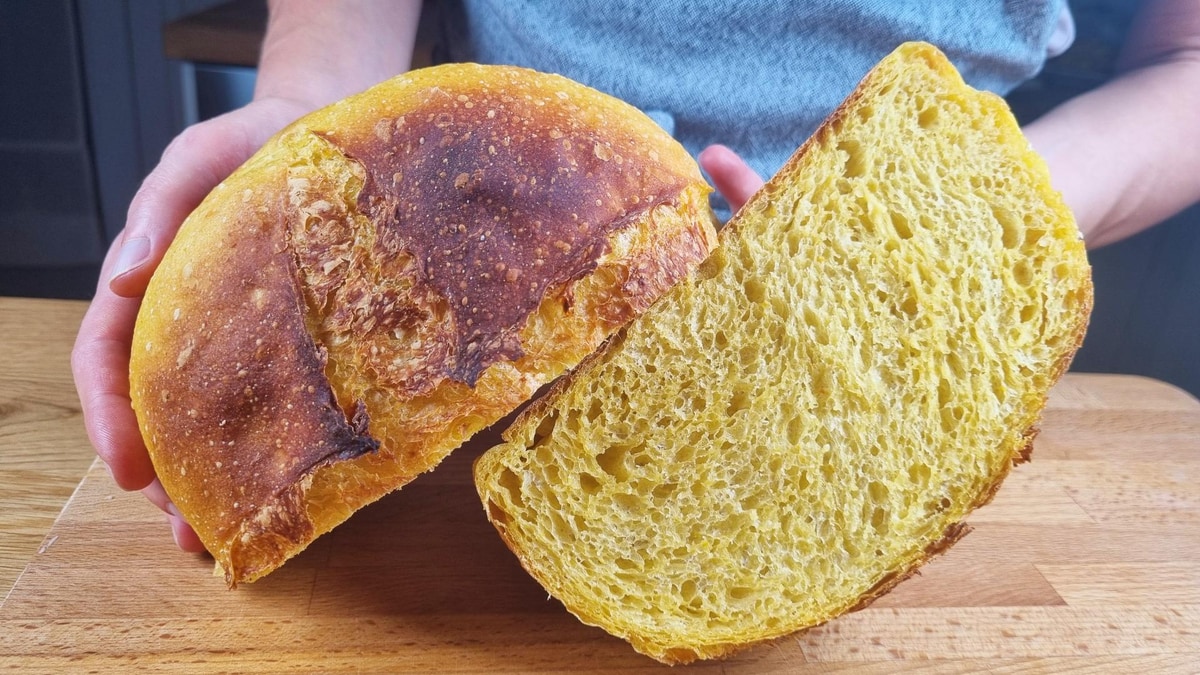
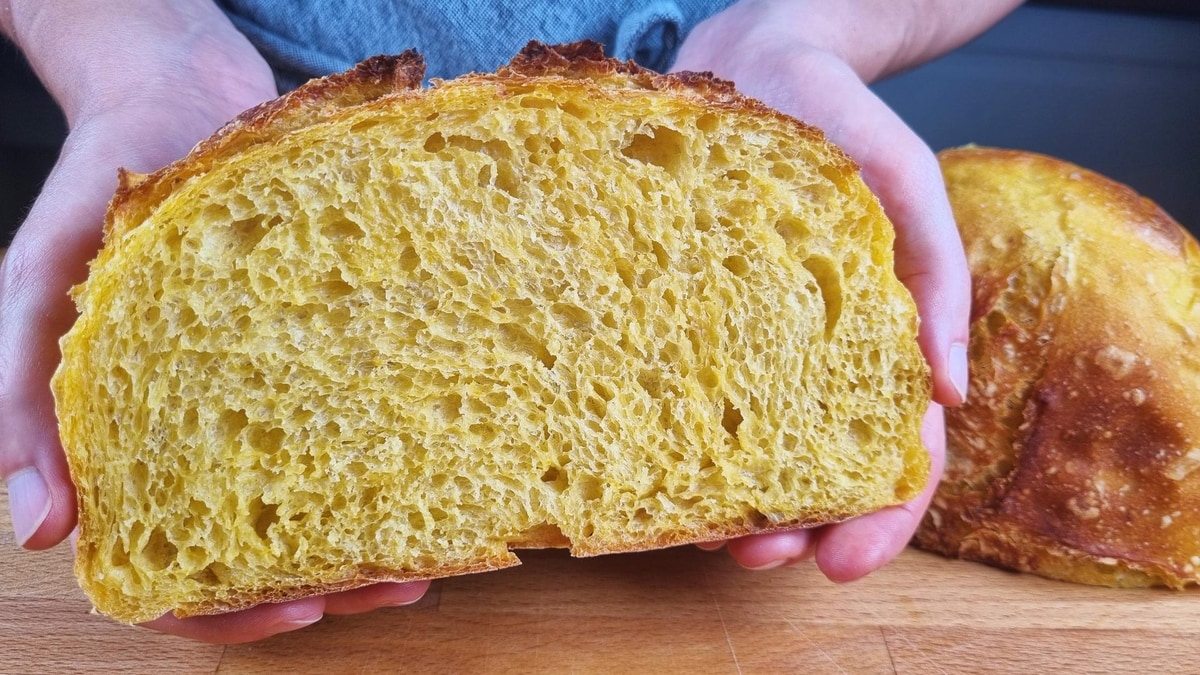
Soft, warm, full of autumn vibes - that color comes straight from pumpkin
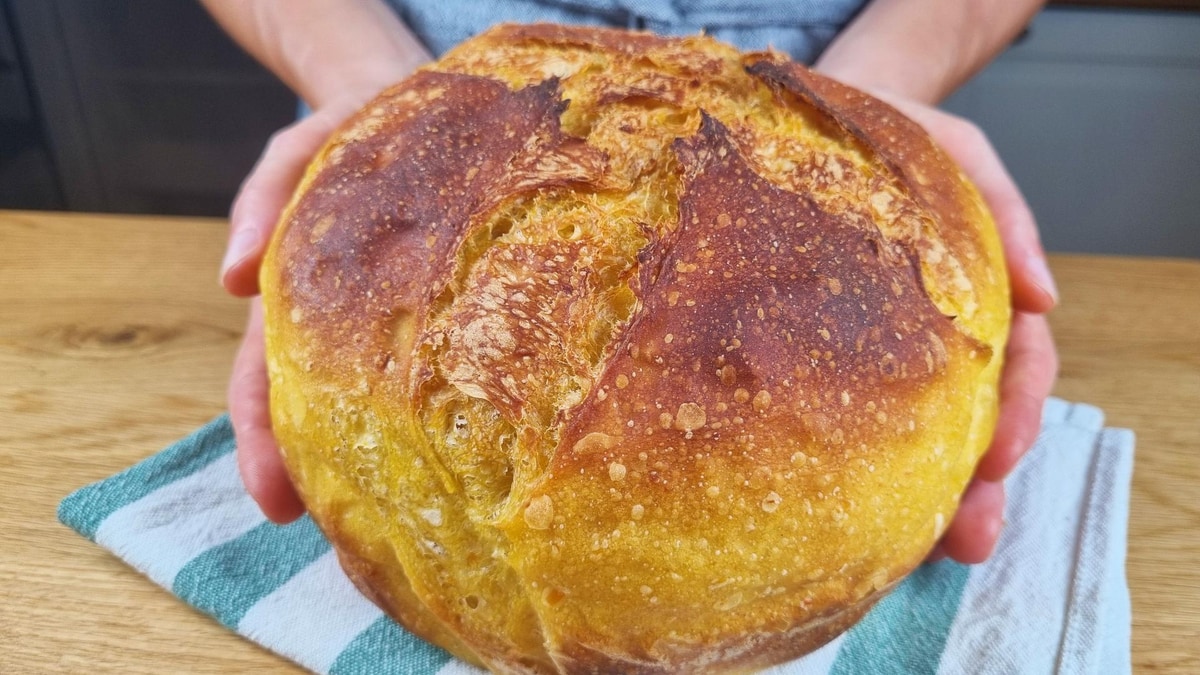
Soft, warm, and full of autumn vibes! This beautiful pumpkin bread gets its gorgeous color straight from real pumpkin puree - no artificial coloring needed. It tastes just as good as it looks with a super soft inside and thin, crispy crust that sings as it cools. The homemade pumpkin puree creates such a thick, colorful dough that bakes into something truly special. This no-knead method makes it accessible for beginners while delivering professional results.
Pumpkin Bread - Soft, Warm, Full of Autumn Vibes
Follow along with this detailed video guide to create this beautiful pumpkin bread with no-knead method
Follow along with the video for a complete visual guide. You'll see exactly how the pumpkin puree transforms the dough into that beautiful golden color, and I'll show you the gentle 'lift and slap' technique that creates perfect texture.
Simple Pumpkin Bread Ingredients
- ¾ cup Water(190 ml)
- ¾ tsp. Fresh yeast(3 g, or ½ tsp. (2 g) dry yeast)
- ½ cup Pumpkin puree(130 g - homemade puree is so thick and colorful!)
- 2 ½ cups Bread flour(320 g)
- 1 ¼ tsp. Salt(7 g)
Step-by-Step Pumpkin Bread Instructions
- 1Mix wet ingredients: In a large bowl, mix water with fresh yeast (or dry yeast) until dissolved. Add pumpkin puree and mix well. Homemade puree is so thick and colorful!
- 2Add dry ingredients: Add bread flour and salt to the mixture. Mix until there's no more dry flour - just mix, no need to knead!
- 3First rest: Cover and let rest for 30 minutes. A timer will remind you of the next step.Timer Available:First Rest (30:00)
- 4Stretch and fold: With a wet hand, stretch the 4 sides of the dough and fold to the center. This develops the gluten structure gently.
- 5Lift and slap technique: Lift the dough and slap it back into the bowl. I call this technique 'lift and slap' - it builds strength without kneading.
- 6Second rest: Cover and let rest for 30 minutes. The dough will become more elastic.Timer Available:Second Rest (30:00)
- 7Repeat stretch and fold: Repeat the steps from before - stretch and fold the 4 sides. The dough is now much more elastic. Lift and slap once more.
- 8Final rise: The dough is now ready for the final rise. Let rise until it doubles in size - it usually takes about 2 hours.Timer Available:Final Rise (2:00:00)
- 9Shape the dough: Sprinkle flour on work surface. Fold the dough in half. Big bubbles are a great sign! Gently flatten the dough into a long strip.
- 10Roll the loaf: Roll tightly from one end. Then roll in the opposite direction to form a ball. Rub against work surface to seal.
- 11Prepare for baking: Use a deep pot to bake it. I recommend lining the pot with baking paper for easy removal.
- 12Final proof: Cover with a towel and let rise for 1 hour until puffy and light.Timer Available:Final Proof (1:00:00)
- 13Score and prepare: Score the bread with a sharp blade or knife. Sprinkle a little water on the sides - just a few drops to create steam.430°F (220°C)
- 14Cover for baking: Cover with a lid or another pan. Preheat oven to 430°F (220°C) if not already heated.430°F (220°C)
- 15Steam baking: Bake at 430°F (220°C) for 20 minutes covered. This creates that perfect crispy crust.430°F (220°C)Timer Available:Covered Baking (20:00)
- 16Final baking: Take the cover off and bake for 10 more minutes. It looks great!430°F (220°C)Timer Available:Final Baking (10:00)
- 17Cool and enjoy: It sings as small cracks form on the crust! The thin, crispy crust gives way to a super soft inside. Now the most important part - the butter! YUM!
Watch the Video Tutorial
See every step in action! Follow along with the complete video guide for perfect results.
You Might Also Like
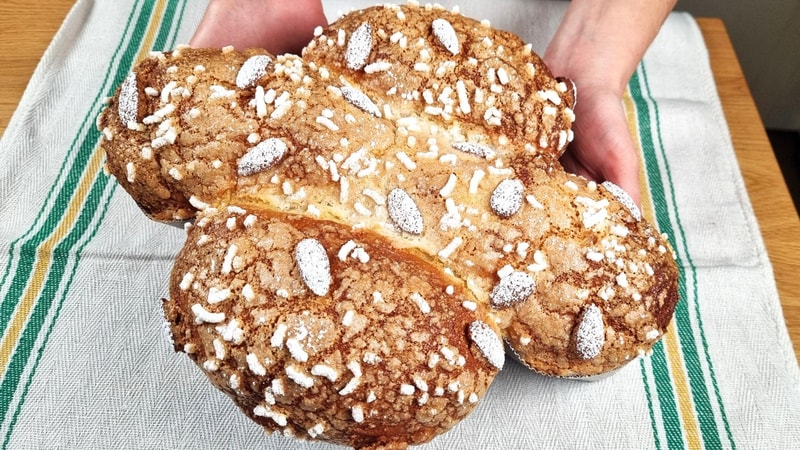
Italian Easter Colomba Bread (Simplified)
A simplified Italian Easter colomba with citrus-honey aroma, rich buttery dough, and almond glaze. Festive, fluffy, and perfect for spring celebrations.
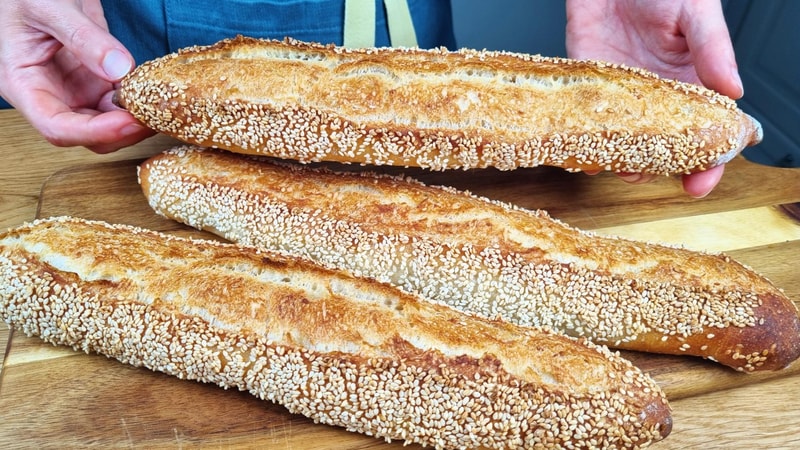
Golden Sesame Baguettes with Crispy Crust and Soft Inside1
The smell of toasted sesame is irresistible! These golden baguettes deliver perfect crunch outside with soft, airy crumb inside. Watch this therapeutic bread-making process and learn all the secrets for achieving sesame-crusted perfection.